Setting up your
Private Cloud.
Follow these 4 steps to deploy the database to your own account. If you prefer watching to reading, scroll to the bottom for the video walkthrough.
Your Personal Cloud
Instead of storing your domains on our servers, we deploy a private D1 Database to your own Cloudflare account.
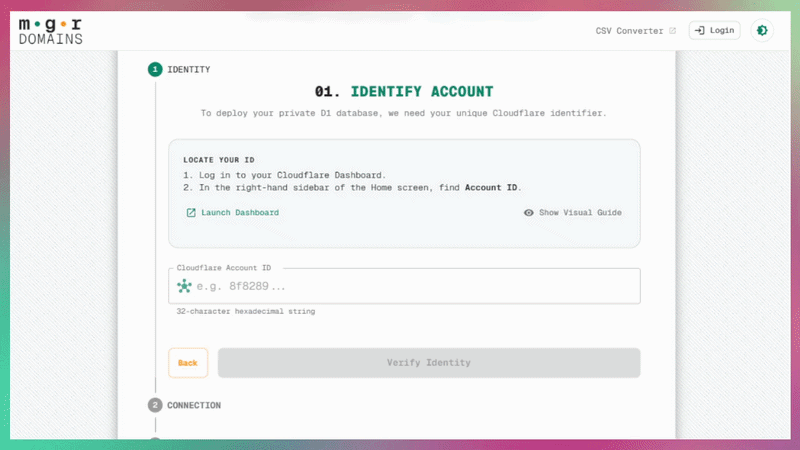
If you don't have one, sign up for a free Cloudflare account. Their free tier is more than enough to handle tens of thousands of domains.
The Digital Handshake
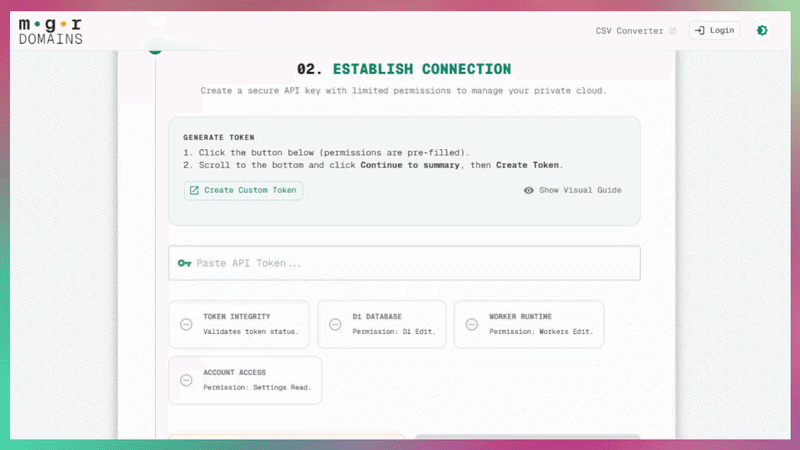
You need to generate an API Token. This acts as a secure "key" that gives our setup wizard permission to initialize the database schema on your behalf.
Crucial: Ensure you only grant EDIT permissions for Workers Scripts and D1 and READ permissions for Account Settings. This follows the principle of least privilege.
Your Master Password
Choose a strong Master Password. This is used to encrypt your registrar API keys (GoDaddy, Namecheap) locally in your browser before they are saved to your new database.
Because encryption happens locally, we have NO WAY to reset this password for you. If you lose it, you must rely on Step 4.
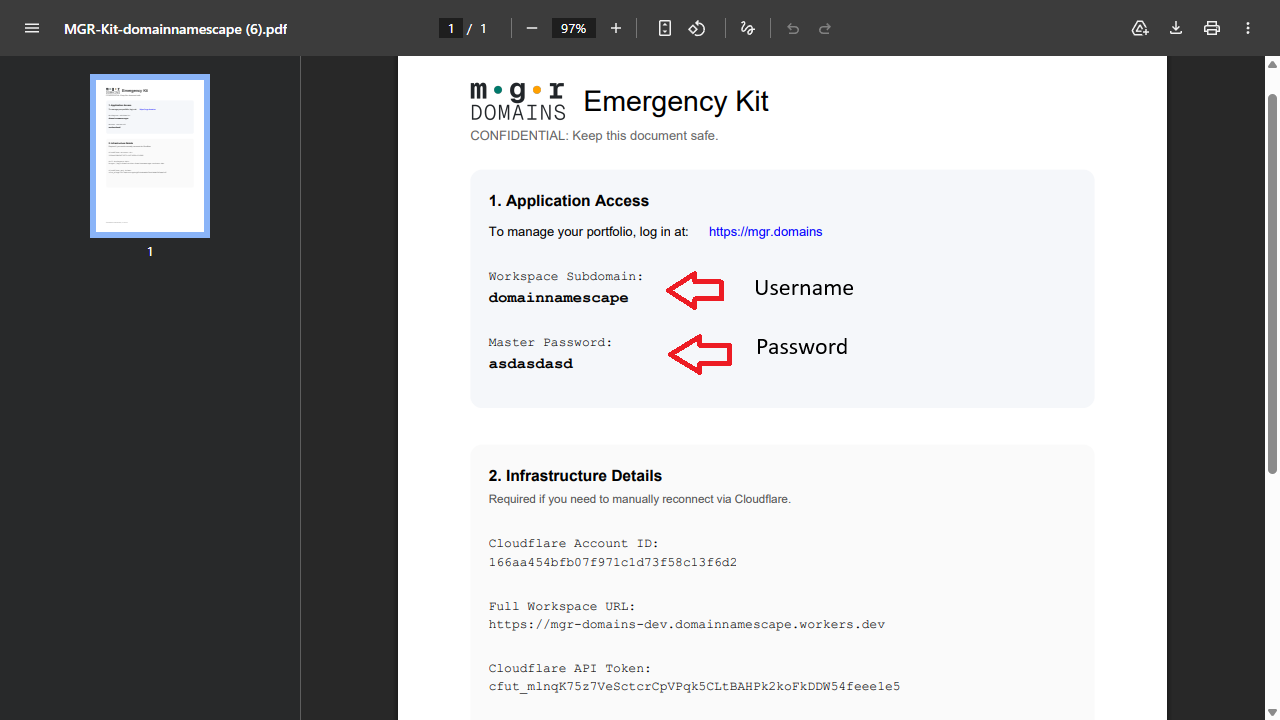
The Emergency Kit
Once your workspace is configured, the system will generate an Emergency Kit PDF. This contains your raw recovery tokens and Cloudflare Account ID.
Pro Tip: Save this PDF in a secure location (like 1Password or a hardware key). It is the only way to restore your app session on a new computer.